|
1951 Chevy Accessories Installation Manual |
|||
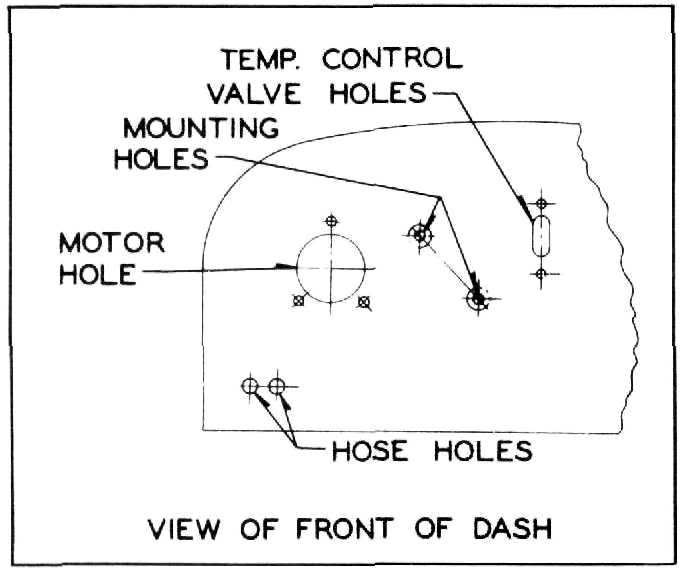 |
6. On the right-hand side of dash, cut
necessary holes in dash
mat thru punched holes provided and attach temperature control
valve. (See figure
97.)
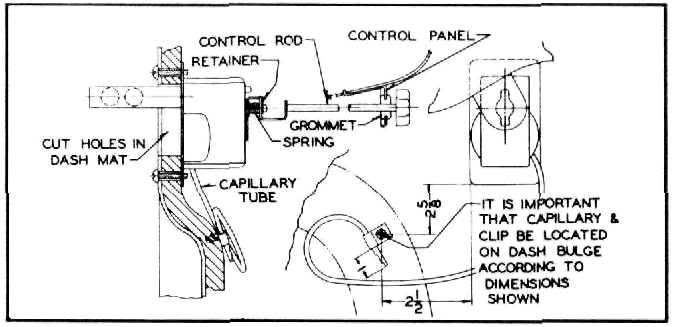
7. Attach temperature control rod bracket to
instrument panel in holes
provided in lower flange to
left of glove compartment. Set control rod thru panel hole and insert
rubber grommet. Remove
retainer from temperature
control valve, attach control rod and replace retainer.
8. Attach end of
control valve capillary tube to dash
mat, (see figure 99). |
||
 |
|||
|
Figure
97
to heater
and install grommets, (see figure 100). Pierce the dash mat from the engine
side thru the mounting bolt
holes and from the passenger side cut two 1-3/4 diameter holes in the dash
mat at these points to allow bracket to rest against
dash.
3. Set heater in place with gasket between
heater case and cowl panel.
Attach to cowl panel using five
of the cover plate screws. A
hex head bolt is furnished for the front center hole. Attach dash mounting
bracket with nuts and washers
furnished.
4. Assemble motor
seal to dash using cover plate
screws.
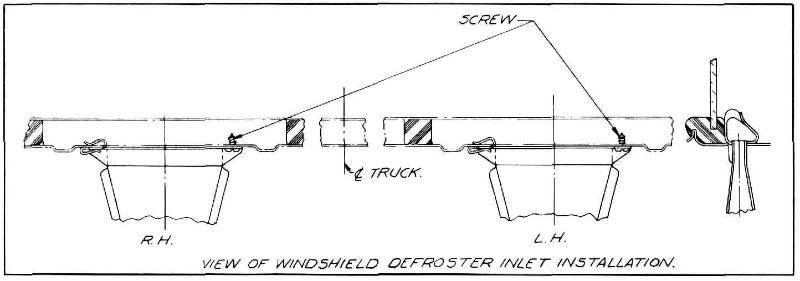
5. Assemble the two lengths of hose to the
defroster fittings and
attach the fittings under the
cowl as indicated with the sheet metal screws furnished. The long hose is used
on the left side and the short
one on the right. It is
necessary to remove the glove compartment from the instrument panel to
install the fitting on the
right side. |
|||
|
Figure 99
9. Attach defroster control cable bracket to
instrument panel in holes provided to left of steering column.
10. Attach defroster control cable thru hole in
bracket and to heater as shown
in figure 101.
11. Install air switch to the right of defroster
control bracket and connect
and assemble wires in clips as
indicated.
12. Drain radiator, remove pipe plugs at points
A & C, insert nipples and
attach hose connections,
(see figure 100). |
|||
|
|
|||
 |
|||
|
|
|||
|
Figure 98 |
|||
|
|
|||
|
37 |
|||
|
|
|||
| « PREVIOUS PAGE | CONTENTS PAGE | NEXT PAGE » |
|
|