|
1951 Chevy Accessories Installation Manual |
|||
|
2. Remove clock hole cover plate, cover plate
support and
discard.
3. Mount instrument panel clock housing and
clock housing support furnished
in package and secure to
instrument panel with nuts and
washers previously removed, in addition to nut and lockwasher furnished in
package.
4. Install clock in
housing, making sure the spring clips
on the sides of the clock are aligned with the slots in the housing and
the face of the clock is
right-side up.
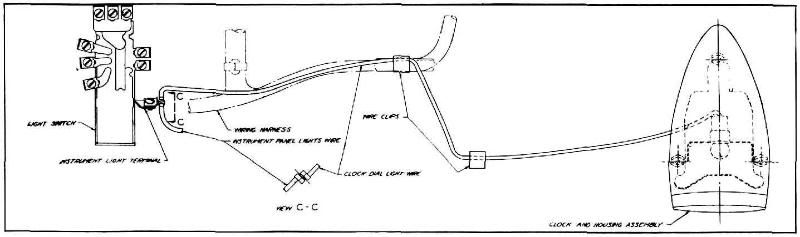
5. Assemble wires in clips on back of
instrument panel and connect the dial light lead to the instrument light terminal on the
light switch (see figure 7) and the clock power lead to the lower center terminal on the
battery side of the accessory
junction block, (see figure
8).
Approximate Flat Rate
Time .3 of an hour. 986525 SPRING WIND
CLOCK
Procedure
for Installing Spring Wind Clock on
Special Model Passenger Cars.
1. From inside upper portion of instrument
panel, remove nuts and washers
from the two studs of the
instrument panel clock hole cover plate assembly. (Save two nuts and
washers for
reassembling.)
2. Remove instrument panel clock hole cover
plate support and instrument
panel clock hole cover plate
assembly and discard.
3. Install
instrument panel clock housing and clock housing support on instrument
panel, using the two removed nuts and
washers plus the nut and washer furnished in the package. (See
figure 7.)
4. Place clock dial light wire attached to
back of clock through hole in
housing and assemble clock
into instrument panel housing making sure that the spring clips on sides of
clock are aligned with slots in
the housing |
and the clock face is right side
up. (See figure
7.)
5.
Install dial light wire in clips on back of instrument panel (see figure 7) and attach
the terminal of dial light
lead to instrument light
terminal of light switch, (see figure 7).
Approximate Flat Rate Time .2
of an hour.
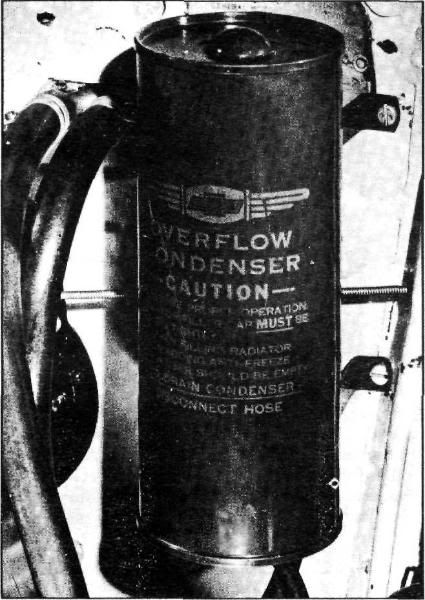
986282 RADIATOR OVERFLOW CONDENSER
Procedure
for Installation of
Radiator
Overflow Condenser
on All
Model Passenger Cars and Trucks |
||
 |
|||
|
Figure 10 |
|||
|
|
|||
 |
|||
|
|
|||
|
Figure 9 |
|||
|
|
|||
| « PREVIOUS PAGE | CONTENTS PAGE | NEXT PAGE » |
|
|